# Others
# Components communication
You can use ZKBus to implement component communication for any Zerker component.
ZKButton btn = ZKButton("assets/btn.png");
btn.onTap = (){
	ZKBus.emit("SHOW", 300);
};
this.stage.addChid(btn);
...

/// other scene
ZKBus.on("SHOW", (posx){
	ZKTween(node).to({"x": posx}).start();
});
Use it to even communicate between flutter native widgets and zerker elements.
body: Center(
	child: Column(
 		mainAxisAlignment: MainAxisAlignment.center,
 		children: <Widget>[
 			RaisedButton(
 				onPressed: () {
                  ZKBus.emit("ADD_NEW_CIRCLE");
                },
           		child: const Text('click', style: TextStyle(fontSize: 20)),
            )

            ...
        ]),
	)

/// In Zerker App
ZKBus.on("ADD_NEW_CIRCLE", (){
	ZKCircle circle = ZKCircle()
		..setScale(2)
		..setPosition(x, y)

	scene.addChild(circle);
});
Remember, the event listener is also destroyed when dispose the zerker app.
void dispose() {
super.dispose();
ZKBus.off("SHOW");
}
# Preload and Assets management
Regarding assets, I recommend you read this article. https://flutter.dev/docs/development/ui/assets-and-images (opens new window)
# Note: Preloading in zerker is not required. Of course, if you want to do this, you can use the following method.
Map urls = {
"dot": "assets/dot.png",
"json": "assets/data.json",
"cloud": "assets/cloud.png",
"enemy": {"json": "assets/altas1.json", "image": "assets/altas1.png"},
"jump": {"image": "assets/jumpsheet.png", "width": 32, "height": 32},
}
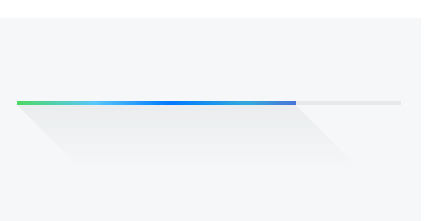
var onProgress = (scale){
print("Current loading progress $scale");
progressLine.scaleX = 10 * scale;
};
ZKAssets.preload(urls:urls , parallel:6, onLoad: onLoad, onProgress: onProgress);
...
/// use Assets
ZKImage dot = ZKImage(key: "dot");
ZKSprite enemy = ZKSprite(key: "enemy");
var json = ZKAssets.getAsset("json");
Of course you can also use the method of instant loading.
ZKSprite enemy = ZKSprite("json": "assets/altas1.json", "image": "assets/altas1.png");
enemy.onLoad = ...

ZKSprite abc = ZKSprite(image: "assets/abc.png");
abc.onLoad = ...
# How to add interaction
Adding interactions in zerker is easy.
Currently supported events are
onTapDownonTapUp, please let me know if you need other events, maybe they will join them later.
- Open the global interactive switch
Zerker(
  app: MyZKApp()
  interactive : true
  ),
- Add click events to specific elements
sprite = ZKSprite(key: "boy")
  ..onTapDown = (event) {
    print("click");
  };
- If you want to add a global click, add it on the stage.
stage.onTapDown = (event) {
  print("stage click");
};
- Sometimes to save performance and improve performance, we also turn off the switch in the scene that does not require interactive elements.
node.interactive = false;
rect.interactive = false;
circle.interactive = false;
# Some random functions
# random color
/// use app getRandomColor method
ZKRect rect = ZKRect(10, 10, getRandomColor());
# random position in zkapp size
/// use app getRandomPosition method
var pos = getRandomPosition();
node.x = pos.x;
node.y = pos.y;
# get a random number
/// use app getRandomA2B method
double r = getRandomA2B(0, 100);
node.x = r;
node.y = r;
# Set size and full screen
return Scaffold(
    appBar: AppBar(
      title: Text(widget.title),
    ),
    body: Center(
      	child: Container(
    	color: Colors.amber[600],
        width: 350.0,
        height: 350.0,
        child: Zerker(app: MyZKApp()),
    	),
    ));
Setting up full screen is easy, you can refer to this article. http://developine.com/flutter-full-screen-splash-screen-tutorial/ (opens new window)